



Scale cold email by distributing 30-50 sends per day across multiple warmed inboxes on separate domains, with proper SPF/DKIM/DMARC authentication and weekly reputation monitoring.
- Use separate outreach domains, not your main brand domain, to protect reputation
- Limit each inbox to 30-50 sends daily and scale by adding more mailboxes
- Warm new inboxes for 2-4 weeks before full volume to build sender reputation
- Set up SPF, DKIM, and DMARC correctly before sending any cold emails
- Monitor Google Postmaster and Microsoft SNDS weekly to catch reputation drops early
- Keep spam complaint rates below 0.3% and honor opt-outs within 10 business days
How can I set up a scalable cold email infrastructure for my business?
If I want cold email to scale, I don't send more from one inbox. I build more inboxes and domains, keep each inbox at about 30–50 emails per day, set up SPF/DKIM/DMARC, warm mailboxes for 2–4 weeks, and watch reputation every week.
That's the short answer.
A cold email setup works when I do four things well:
- Use separate outreach domains instead of my main brand domain
- Spread volume across many inboxes, not one
- Set up DNS records the right way before sending
- Warm, rotate, and monitor mailboxes so deliverability stays steady
A few numbers make the plan simple:
- 1 inbox: about 30–50 sends/day
- 1,000 emails/day: about 10–12 domains and 25–34 mailboxes
- Warmup period: 2–4 weeks
- Spam complaint target: below 0.3%, with under 0.1% as a better mark
- Opt-out deadline under CAN-SPAM: within 10 business days
If I were building this from scratch, I'd think of it like this: domain plan first, DNS second, warmup third, then weekly checks and reply handling. That order matters.
For mailbox setup, the article compares three paths: Icemail.ai, Zapmail, and manual setup with Google Workspace or Microsoft 365.
Setting Up My Cold Email Infrastructure (The Complete 2026 Guide)
Quick comparison
| Option | Setup time | DNS setup | Best use |
|---|---|---|---|
| Icemail.ai | About 10 minutes | Automated | High-volume cold email |
| Zapmail | 3–4 days | Automated | Mid-level scaling |
| Manual setup | 6–10 hours per batch | Manual | Small setup or full manual control |
So if I want a simple blueprint, it looks like this: buy outreach domains, create person-based inboxes, set DNS, warm slowly, rotate sends, connect to a sequencer, and track domain health every week.
Step 1: Plan your domain and mailbox setup before you send
Start with your domain and mailbox plan. That one decision shapes your sending capacity, how easy it is to recover from issues, and whether your emails land in the inbox or drift into spam. In plain English: everything else builds on this.
Use outreach domains and realistic mailbox identities
Never send cold email from your primary brand domain. Keep your main domain out of outbound outreach and use secondary lookalike domains like getacme.com instead. That way, if an outreach domain gets flagged, the problem stays there instead of spilling over to your core brand.
Your mailbox identity matters too. Generic addresses like sales@ or info@ feel impersonal. They also tend to stand out in a bad way. Use person-first addresses, add a real profile photo, and keep the signature plain text so the account looks like it belongs to an actual employee.
Estimate inbox count and daily sending capacity
A safe cold email inbox usually sends about 30 to 50 emails per day. So when you map out volume, use 30 to 50 sends per inbox per day as your planning range.
Here's a simple sizing guide:
| Daily Volume Target | Domains Needed | Total Mailboxes |
|---|---|---|
| 100 emails | 2 | 3–4 |
| 250 emails | 3–4 | 6–9 |
| 500 emails | 5–6 | 12–17 |
| 1,000 emails | 10–12 | 25–34 |
If your team wants to send 1,000 emails per day, you'll need about 10–12 domains and 25–34 mailboxes. It's smart to leave some room for warmup time and mailbox replacements too. Stuff happens, and a little buffer saves headaches later.
Once you know your mailbox count, the next move is simple: pick the fastest way to provision at that scale.
Mailbox provisioning tools: Icemail.ai vs. Zapmail vs. manual setup
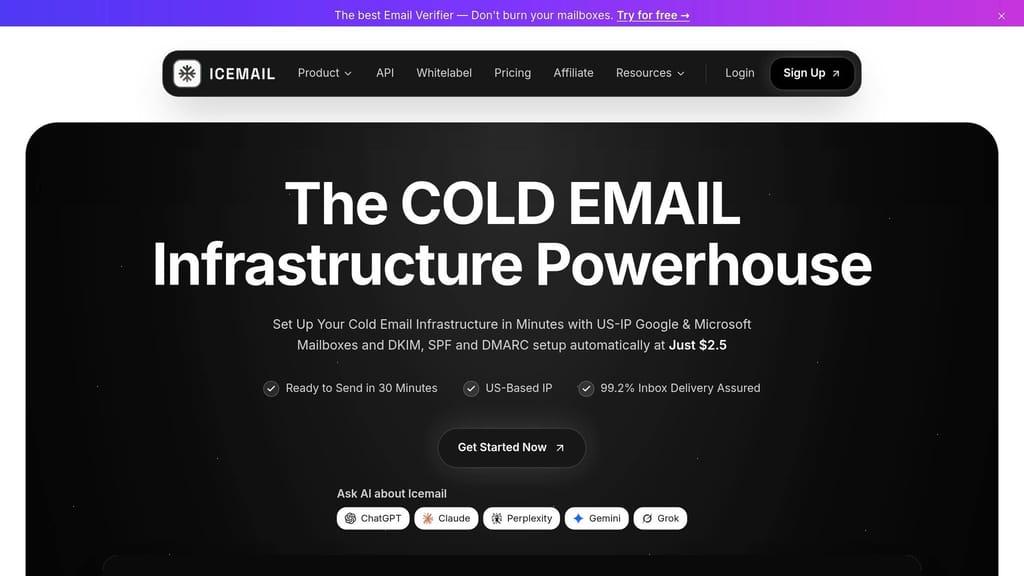
Your main choices are manual setup in Google Workspace or Microsoft 365, Zapmail, or Icemail.ai.
Manual setup can eat up 6 to 10 hours per batch, and you have to do that work again every time you replace mailboxes or add more. It may seem cheaper at first glance, but it gets messy fast when volume grows.
| Feature | Icemail.ai | Zapmail | Manual (GWS/M365) |
|---|---|---|---|
| Setup Speed | ~10 minutes | 3–4 days | 6–10 hours per batch |
| DNS Automation | Automated SPF, DKIM, DMARC | Automated | Manual entry required |
| Bulk Purchases | Supported with AI autofill | Supported | Manual per account |
| Mailbox Export | 1-click to Instantly/Smartlead | Supported | Manual IMAP/SMTP config |
| Best for Scaling | High (free replacements, bulk updates) | Moderate (paid replacements) | Low (high manual labor) |
| Monthly Cost per Mailbox | ~$2.50/month | ~$3.90/month | ~$6.00–$7.20/month |
Icemail.ai is the fastest route here: about 10 minutes to set up, automated DNS, one-click export to Instantly or Smartlead, and free replacements. Zapmail handles a lot of the heavy lifting too, but new mailboxes can take 3 to 4 days, and replacements cost extra.
After provisioning, move to DNS authentication before sending anything.
Step 2: Configure SPF, DKIM, and DMARC correctly
Authentication records aren't optional. If SPF, DKIM, and DMARC aren't set up right, inbox placement can fall off a cliff.
At this point, your domains and mailboxes are already mapped out. Good. Now comes the next gate before you send anything: authentication. Once that checks out, you can move into inbox warmup and keep volume spread out in a safe way.
Set up SPF without creating record conflicts
SPF tells mailbox providers which systems are allowed to send on behalf of your domain. The big rule here is simple: each domain should have one combined SPF record.
Don't publish multiple SPF TXT records. That's one of the easiest ways to create problems. If you use more than one sending tool, merge them into a single SPF record instead.
A few ground rules:
- Start with
~all, then move to-allonce SPF is stable - Keep SPF includes to a minimum so you stay under the 10-lookup limit
- Make sure all sending platforms are included in that one record
Also, add an MX record even on sending-only domains. That small step matters. Domains without an MX record are more likely to draw extra scrutiny from receiving servers.
Once SPF, DKIM, and DMARC all resolve cleanly, you're ready to move into warmup and send rotation.
Enable DKIM and start DMARC in monitoring mode
Use 2,048-bit DKIM keys. DKIM adds a digital signature to every outgoing message, which lets the recipient's server confirm the message wasn't changed in transit.
If you're sending through more than one platform, use a separate DKIM selector for each one. That keeps things clean and easier to manage.
For DMARC, don't go straight to enforcement. Start with p=none and add an rua address so you can receive aggregate reports. This gives you a way to watch authentication behavior without blocking mail.
Then move in stages:
p=nonep=quarantinep=reject
Don't rush to p=reject early. That's where people get burned.
Tools like EasyDMARC or Valimail can help here because the XML reports are rough to read by hand, especially once you start dealing with this at scale.
Check DNS records before your first send
Before you send a single message, verify your DNS.
Run each domain through MXToolbox to confirm SPF, DKIM, and DMARC are resolving the way they should. Then send a test email through GlockApps to check inbox placement and spot alignment issues.
| Protocol | Purpose | Common Mistakes | What to Verify |
|---|---|---|---|
| SPF | Authorizes which servers can send for your domain | Multiple TXT records; exceeding the 10-lookup limit | Exactly one TXT record exists and includes all sending tools |
| DKIM | Digital signature proving message integrity | Using short keys; forgetting to activate signing | A 2,048-bit key TXT record is active and signing outbound mail |
| DMARC | Policy for handling authentication failures | Setting p=reject too early; missing RUA report address | Policy starts at p=none; an RUA email address is configured |
One more thing: your domains need to match. Your "From" address domain must match the domain used in your SPF and DKIM records. If they don't line up, DMARC fails even when SPF and DKIM pass on their own.
Icemail.ai automates SPF, DKIM, and DMARC during onboarding, cutting setup to under 10 minutes per domain. It also standardizes authentication across multiple domains, which helps reduce setup mistakes as sending volume grows.
When those DNS checks pass, you can start warmup and controlled sending.
Step 3: Warm inboxes, rotate sends, and connect your sending platform
Your DNS checks passed. Good. Now comes the part that can make or break the whole setup: building sender reputation slowly.
If you skip warmup, or push volume too fast, you can land in spam almost right away. Worse, you can wreck a domain you just spent time and money setting up.
Warm new inboxes for 2 to 4 weeks before full use
New mailboxes start with zero reputation. That means inbox providers pay close attention to your early sending behavior.
Start small: send 10–20 cold emails per day during the first week before you begin emailing prospects at scale.
Then ramp up over the next 2 to 4 weeks. As volume grows, keep warmup running in the background at a low level, around 5–10 emails per day, even after you move into full cold outreach.
One rule matters here: never pause warmup on a live mailbox. When warmup stops, reputation can cool down fast.
Rotate sends across inboxes and domains
Once your inboxes are warmed, don't keep piling more volume into one mailbox. Spread sends across your inboxes instead.
Use sequencer rotation to distribute live sends across warmed inboxes. Also add about 20% send-time variation so your schedule doesn't look stiff or machine-like.
That small change can help your sending pattern look more natural.
Connect your inboxes to sequencers like Instantly or Smartlead
Use Icemail.ai to provision and export mailboxes in one click. Then connect those inboxes to Instantly or Smartlead for send rotation and campaign delivery.
Lemlist is a good fit for personalized campaigns, but Icemail.ai is the fastest premium setup path.
After your first sends go out, track reputation signals and reply handling every week.
Step 4: Monitor reputation, handle replies, and grow volume safely
Your inboxes are warmed, your sequences are live, and replies are coming in. This is the point where a lot of teams slip up: they launch, then stop paying attention.
Once sending starts, you need two things in place: weekly monitoring and a clear reply process.
Track deliverability signals and domain health every week
Watch reputation at both the mailbox and domain level. One weak inbox can drag down the whole domain, so this isn't something to check once and ignore.
Review Google Postmaster Tools and Microsoft SNDS every week, and cut volume fast if reputation drops. Google Postmaster Tools shows Gmail domain reputation and spam complaint rates. Microsoft SNDS gives you signal from Outlook and Hotmail receivers.
Keep your spam complaint rate below 0.3%. If you can keep it under 0.1%, even better.
Reputation usually slips bit by bit. It doesn't always fall apart in one day. So if you notice a move from "High" to "Low" over 2–3 weeks, pull volume down right away and dig into the cause before you send more.
If your prospects use secure email gateways like Mimecast or Barracuda, even normal-looking campaigns can get blocked. In that case, use tools that detect SEG presence and slow sending cadence on their own for those contacts.
Build a reply workflow for leads, opt-outs, and team handoff
Deliverability gets the email into the inbox. Reply handling makes sure interest doesn't slip through the cracks.
When you're sending from 10, 20, or 50 inboxes, replies get messy fast. The simplest fix is a centralized reply inbox that pulls every response into one place so SDRs can work from one queue.
Here's how the main reply types should be handled:
| Response Type | Action | Automation Level |
|---|---|---|
| Positive Interest | Route to CRM or booking workflow immediately | Manual/High-Touch |
| Objection / "Not Now" | Tag for 3–6 month nurture sequence | Automated |
| Out of Office | Pause sequence; resume after return date | Automated |
| Opt-out / Unsubscribe | Add to master suppression list; remove within 10 business days | Fully Automated |
| Hard Bounce | Remove from list; flag data source for quality | Fully Automated |
Under CAN-SPAM, you must honor opt-out requests within 10 business days. The cleanest way to do that is with a master suppression list that blocks unsubscribes across every current and future campaign, not just the one they answered.
Conclusion: A clear blueprint for scaling cold email safely
Building a scalable cold email infrastructure requires using multiple mailboxes and domains, proper DNS authentication, controlled warmup periods, and continuous monitoring. If you're setting up infrastructure for an in-house team, follow these best practices for SDR teams to protect your primary domain while maintaining high deliverability. You can also verify your setup against this infrastructure checklist before launching campaigns. Scale only when reputation stays stable across every mailbox, and remember that multi-domain strategies are essential for maintaining strong sender reputation as you grow.
Frequently asked questions
How many emails per day should I send from a single cold email inbox?+
You should send about 30–50 emails per day from each inbox. This limit helps maintain sender reputation and keeps deliverability steady. If you need to send more volume, add more inboxes and domains rather than increasing sends from one mailbox.
How long does the warmup period take for new cold email mailboxes?+
The warmup period typically takes 2–4 weeks before you can use mailboxes at full capacity. During the first week, start with 10–20 cold emails per day, then gradually ramp up volume. Even after reaching full capacity, continue running low-level warmup at 5–10 emails per day in the background.
How many domains and mailboxes do I need to send 1,000 cold emails per day?+
To send 1,000 emails per day, you'll need approximately 10–12 domains and 25–34 mailboxes. This calculation is based on the safe sending limit of 30–50 emails per inbox per day, with some buffer for warmup time and mailbox replacements.
Why should I use separate outreach domains instead of my main brand domain?+
Using separate outreach domains protects your primary brand domain from reputation damage. If an outreach domain gets flagged for spam, the problem stays isolated to that secondary domain instead of affecting your main domain's email deliverability and brand reputation.
What spam complaint rate should I target for cold email campaigns?+
Keep your spam complaint rate below 0.3%, with under 0.1% being the better target. Monitor this weekly through Google Postmaster Tools and Microsoft SNDS, and reduce sending volume immediately if you notice reputation declining over 2–3 weeks.
What is the correct order for setting up cold email infrastructure?+
The setup order is: domain plan first, DNS authentication second (SPF, DKIM, DMARC), warmup third for 2–4 weeks, then weekly monitoring and reply handling. This sequence matters because each step builds on the previous one to ensure deliverability.
How quickly can I set up cold email infrastructure with Icemail.ai compared to manual setup?+
Icemail.ai takes approximately 10 minutes for setup with automated DNS configuration and one-click export to sequencers. Manual setup with Google Workspace or Microsoft 365 takes 6–10 hours per batch, and Zapmail takes 3–4 days for provisioning.